My daughter just turned 6. We can barely believe it, the years have gone so fast, yet they also seem to have been a loooong 6 yrs - lol. She asked for a "Worm Party". Given that this is probably the last year we'll get away with something non- pink-sparklie-girlie, I took the ball and ran with it! She wanted a pinata and of course being the type of woman who refuses to pay for something I think I could possibly make, I gave it a go. It was quite a job! But I think next time since I have learnt a few things, it would be quicker. I like the idea of putting my own stuff inside it though, given that 6 yr olds still aren't too good with hard boiled sweets, especially if running about playing. I also didn't want unrecognisable ingredients in them like the candy that comes in most store bought ones. We found ONE, yes ONE worm pinata online after a lengthy search (which wasn't available for sale in NZ). This is the finished product - which I think it looks heaps like the original store bought one!

My daughter enjoyed helping me to paste on the crepe paper.
So I thought I'd share how made this, given how tricky I found it to find any info at all on how to do one this shape. Along the way I thought of better and quicker ways to make it and I'll add those ideas in to make it faster for you construct.
Tutorial
 |
| Cut out 2 pieces of thickish cardboard in your worm shape (identical shape). Blow up so small balloons and stick some tape on them (rolled over on itself) to stick to the inside of one piece. Put the top worm piece on top of the balloons after sticking some doubled over tape on the tops of the balloons so they stick. Get some strips of newspaper and tape all around as pictured, to secure. |
|
I actually though afterwards that it would have been better to have used some thick cardboard strips (narrow) and to have stuck them just like the newspaper but INSIDE the worm as it would've made it sturdier for the start of the papier mache part.
 |
| Next, carefully cut out a hole on one or both sides where you want the kids to be able to bash through the papier mache and release the sweets. They'll never get through stiff cardboard otherwise. OR do this before you start the first step as above where I put the full worm on first. Use newspaper strips only for this part to secure it all together with tape. Make sure it's sturdy. |
 |
| Make up some paste out of 1 cup flour and 2 cups warm water (or to your own recipe). Cut up tons of newspaper strips and dip them in the paste. Run your fingers down the strip to get excess paste off or you'll have glue all over the show! Start placing strips flat on the pinata. Do ONE layer at a time and allow to dry for half a day or ideally over night (no one wants mould on their sweets). We did half the pinata at a time, allowed to dry then turned it over and did the other half the next day. We used sauce bottles to keep the worm upright. My advice is to use a plastic tarpaulin over the work surface as the glue just flicks off once dry or washes away in warm water. |
Repeat the layers until you have 4 layers done. I also placed the strips of newspaper in differing directions for more stability. I did a further 3 layers over the part where the sweets were to go (where the cardboard from the structural part was missing).
 |
| Use a stanley (craft) knife to cut a trap-door in the pinata where you want the lolly cavity to be. Reach inside and pull out the balloon/s that have deflated and may be hanging about inside near the hole. Place your sweets, etc inside, tape the door closed with thin tape in 2 places, then papier mache over the trap door with a few layers. |
 |
| Use a hand drill and drill 2 holes in each side in the middle of the worm at the top for hanging some rope or cord through. (See pic of it hanging below). You need to leave a little space and recall where these holes are whilst doing the next part with the crepe paper. |
|
 |
| Cut up assorted colours of crepe paper in strips, we used the stuff you get in rolls. Make "tassels" as above. |
 |
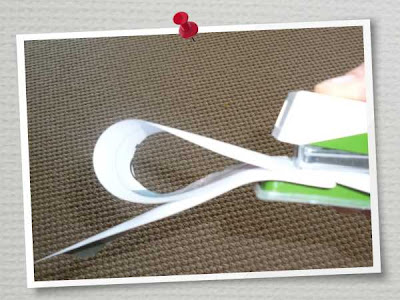
| Use a glue stick (so it doesn't absorb in to the crepe paper and leave a
wet look) and place your crepe paper how you want it, poking a hole
through it where the holes for the rope or cord for hanging will go. Draw some eyes and a smile on paper and stick on. |
 |
| Hang cord or rope through it and place over a hook outdoors (we had no trees so used the patio soffit). |
All Done! The kids had a BALL doing this. We had fourteen 6 yr olds and it took them 3 rounds each of 3 hits to split it. We then tipped it up to get any excess lollies out. We'd told them in advance where the cavity was so they weren't hitting all night long. :-D
I will publish the rest of the Worm Party soon.....


